Colorizing Black and White Photo
There are many ways in Photoshop to colorize a black and white photo; You can use Color Replacement tool or any other way. But in this tutorial I use the CMYK Curve Adjustment Layer I prefer to use this method because you have accurate control on the color you can use, and also you can edit it to change any color later, that you think inappropriate on your colorizing project.
The photo I use in this tutorial is the original one in which I learn this skill, the author is ELYSIUM.
Be sure that you set the photo to CMYK for this tutorial to work.
Image > Mode > CMYK color
Step 1
This is the original photo

Finish project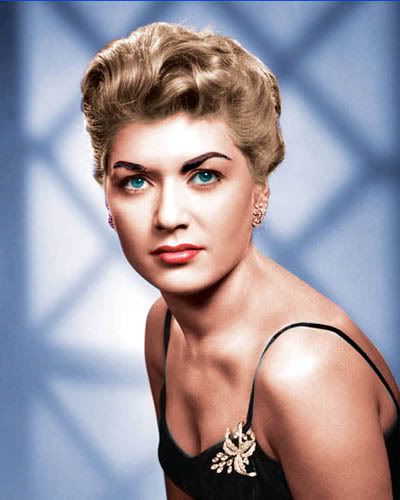
As ELYSIUM stated that the key to a good result is in a good clean source image. The cleaner and higher resolution photo will be easier to work and better result.
Good thing about Adjustment Layer is you can always go back and change them, you can tweak its settings as often as you like until you get it right. You can also use the quick mask method to clean and smooth your selection edges.
Its always good practice to save as often as you can, its time consuming and you don’t want to lose any of you work…
And also always create a layer copy of your photo, so when everything turn bad you still got original copy to work on again.
Step 2: Selection and Quick mask
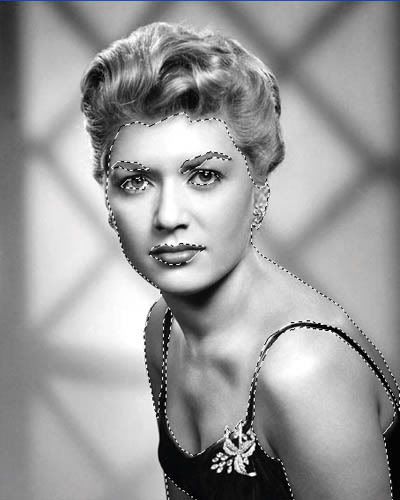
First thing you do is to select an area to color, you can start from the bigger area and work you way down. But it doesn’t matter in what area you begin as long as you are comfortable in which you work. In this tutorial I start with skin.
You can use any selection tool you desire, I start my selection using Pen Tool then work my way on smallest area using the polygonal lasso, I use it on area like the eyes, eyebrows and mouth. Don’t worry if you don’t get your selection right, you can take care of it later using the Quick mask mode.
When you’re done, your selection will look like the image below
To smooth the edges of your selection, use the quick mask mode by clicking the circle-in-a-shade-square icon in the toolbox or by pressing Q on the keyboard. Quick mask allows you to edit a selection using the brush palette, the pink area will be the mask, and the clear area is the paint area in which your color will appear. You can use the opacity of the brush to set the transparency of the edges. You can even use quassian blur to areas mixes with other area.
Using white brush will reveal the area, and black will hide it. You can switch color by clicking on the bended double sided arrow on the set color area.
It should look like the image below.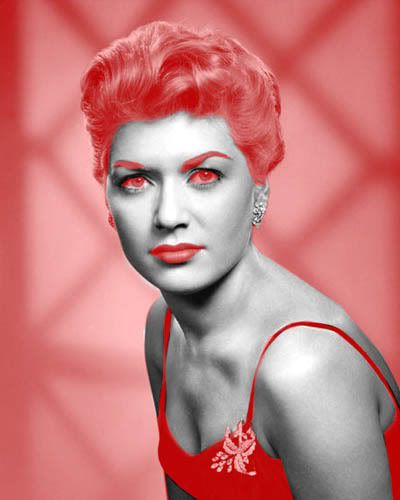
Press Q again to bring the selection back again. Leave the selection.
Now to color it.
Step 3: Adjustment Layers and Curves
Since you’re selection is now ready, let's start.
Click Layer --> New Adjustment Layer --> Curves…
Name the new layer “Skin”
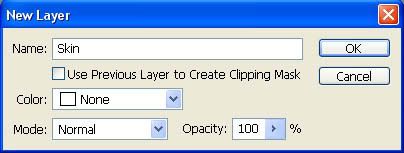
A Curves dialog box will open, and it will add a layer to your palette:
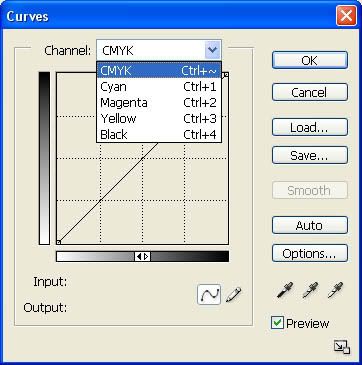
You can now change the curve on each Channel (CYMK) to achieve the color you desire. Since its adjustment layer you can always go back and edit it by simply double clicking on the icon of curves in the layer palette. You can individually adjust the channel to add the color on your selected area. You can even add points on the curve, and tweak the highlights and darks to different hues.
Here are the settings I use on the Skin layer of the photo; you can change it to achieve the color you desire.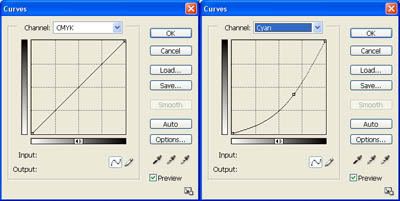
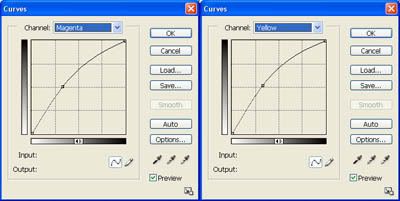
If you want your shadows to be darker you can adjust the Black levels, to adjust the brightness and darkness of the entire range on CMYK curve.
The image should look like this: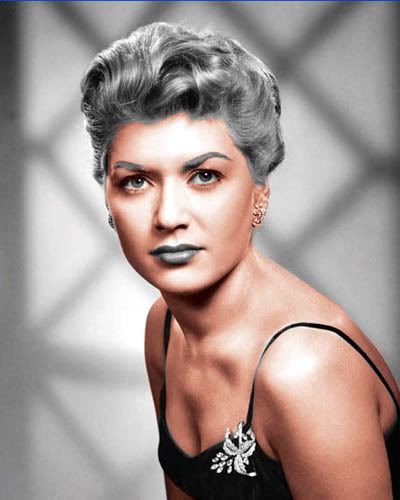
Step 4: Background, Repeat
When you finish the skin, use the same technique on the other part (with different settings on the curves).
Next the background. Same technique, select, quick mask, blur, brush opacity, edit, reselect.
Layers -> New Adjustment Layer -> Curves
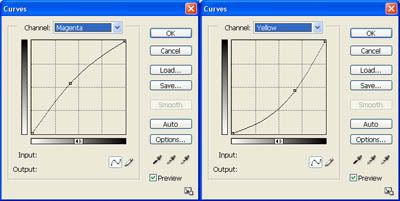
The curve dialogue will come up again, to achieve the blue color you can raise the cyan up, the magenta little and dropped the yellow. You can tweak to achieve the color you want.
The settings I used on background.

Result: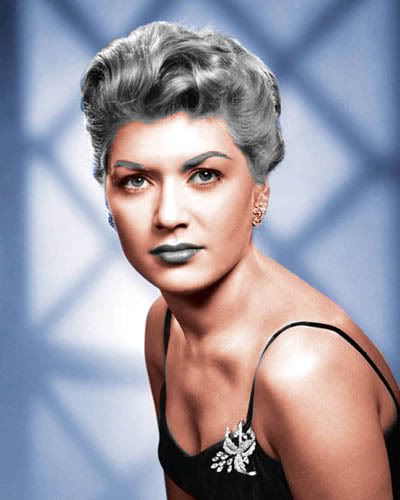
Step 5: On the other part, Hair, Eyes, Eyebrows, Earring, Clothing, and Pin.
Next is hair. New Adjustment Layer, then do it again.
Eyes, New Adjustment Layer.
Eyebrows, New Adjustment Layer.
Earrings, New Adjustment Layer.
Clothing, New Adjustment Layer.
You can do it in any order you like. Just use the same technique and procedure we use on Skin and Background adjust and experiment on the curves to achieve the color you want. As always you can come back to each layer later to adjust the color.
Lips: you can add a regular layer if you want you can draw a lipstick and adjust brightness and contrast to add more glow to the lips.
The final images
You can leave it for a few minutes and come back later so your eyes is refresh, your perception can change dramatically if you don’t look at it for a while. And you can ask someones opinion to improve a little.
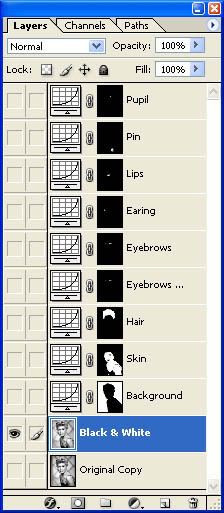
It’s always a good idea to rename layer accordingly, so when you come back to it, you know what layers are you working on. Here are my final layers.
It may be a little complicated as you think, but it’s not. Once you familiarize yourself on the technique, the other part may come naturally. As it is an Adjustment Layer you can always change the color. Layers in your PSD are always editable if you don’t like how it turned out.
It’s get really simple as you practice it.

